by Hib Halverson
Images by Hib Halverson, Zip Corvette and GearWrench
Right here at Zip’s corvettemagazine.com, one in all our initiatives is a 1971 Coupe. Again within the mid-’90s, it was featured within the now-defunct Vette Journal because the “Large-Block from Hell” challenge automotive. The powertrain is a 460-inch Large-Block and a six-speed handbook transmission.
Recently, an intermittent downside has developed with the engine not returning to idle when the automotive is stopped or coasting in impartial. We tried totally different throttle return springs. Whereas that influenced the issue, it didn’t remedy it. Then we thought the electrical choke on the automotive’s 850 CFM Holley four-barrel was malfunctioning, however that proved to be a useless finish, too.
Lastly, we centered on the automotive’s 54-year-old throttle cable. It additionally may be referred to as an “accelerator cable” and the 2 phrases are used interchangeably. Figuring that the cable was often sticking in its housing, we determined to interchange it.
Zip Corvette sells three reproduction cables. The one we selected matches 68-73 (PN CZ-773). The opposite two match 74 solely (CZ-774) and 75-81 (CZ-775). We additionally ordered a 68-82 Corvette Accelerator Cable Retainer and a 68-73 Corvette Accelerator Cable Clamp. Presently, copy accelerator cables for 1982s usually are not obtainable. Some used Corvette components distributors could promote them. Additionally, 82 throttle cables generally seem on eBay.
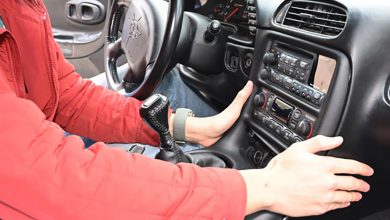
Working underneath the instrument panel of a C3 Corvette is rarely simple, however altering the accelerator cable is especially troublesome due to the place the cable comes via the firewall–a confined area manner excessive up behind the instrument panel. This area is so troublesome to entry that a few of the photographs had been shot with a borescope.

C3 throttle cable alternative requires eradicating bolts from the inside aspect of the firewall; a selected assortment of instruments is required. You want a ¼ inch drive ratchet, a 12 to 14-inch, ¼-drive extension, and two ¼-drive swivel sockets, ⅜-in and seven/16-in.

You’ll need an LED work mild, such because the Gear Wrench GWFL 85 or GWFL105. Both is good for working underneath the IP of a C3 as a result of they’re slim and simple to deal with. Each use lithium-ion batteries. They’ve rotating flex heads to direct mild. Each have three white mild modes: “highlight”, “floodlight”, and “tip mild”. Additionally they have a “purple mild” mode, which is essentially the most intriguing function of those merchandise. For this text, we interviewed Jarrett Wolf, GearWrench Director of Product Administration
“The science behind (this function) is how (our eyes) course of totally different seen mild wavelengths,” Wolf informed CorvetteMagazine.com. “Crimson mild has the longest wavelength of seen colours. The attention’s rods, accountable for low-light and peripheral imaginative and prescient, are much less delicate to purple. As a result of rods don’t reply strongly to purple, a purple mild prevents the attention from being ‘blinded’ or fatigued by white mild. This enables customers’ eyesight to regulate extra rapidly when trying between the sunshine and darker areas of the workspace.
Moreover, purple mild sharpens the notion of edges and small particulars by minimizing blue mild scatter and glare,” Wolf continued. “This creates larger visible distinction, making it simpler to identify small parts, learn markings, and distinguish surfaces in tight or shadowed areas.”
Throughout product improvement, GearWrench designers studied how folks use lights in automotive work. They’re usually used for prolonged intervals in darkish or confined areas. GearWrench decided that including a purple mode would scale back eye pressure and enhance readability the place precision issues most.
The underside of every has a magnetic base, a hook for hanging, and a clamp that spreads as much as two inches. Each have a small magnet subsequent to the tip mild, which is nice for choosing up small ferrous metallic components. On-line reviewers give these lights 4.8 out of 5, so we ordered each and after utilizing them for the a number of hours required to interchange the accelerator cable, we consider the 4.8 overview common is justified. For us, standout options had been battery run time longer than different work lights we’ve used and the purple mild mode. Each are good work lights, however for this job, the GWFL 85 was our favourite due to its shorter size.
Whereas these lights include a cost cable, they don’t include a charger. GearWrench recommends a UL- or SCA-listed, “Class 2” charger that produces 10 watts at 5 volts and has a USB-A connection. An instance of that is the now-discontinued Apple A1385 “Journey Charger,” a lot of which may be discovered on eBay. There are different manufacturers of 10W5V chargers obtainable. Some are UL/CSA-listed, however some usually are not. HD chargers with USB-A outputs can be found from Motorola (20W) and Tripp Lite (14W) and value $22.00 to $28.50.

Earlier than beginning the cable alternative, to stop injury from inadvertent grounding of B+ wiring underneath the IP, disconnect the unfavourable battery cable. Start work by eradicating two bolts that maintain the accelerator pedal meeting to the firewall. This meeting has two components: the pedal rod sandwiched between them, the pedal rod assist, and the pedal rod assist plate or bracket. On a late-69 to 76 stick-shift automotive, the 2 bolts, proven on this picture, maintain a small, sq. plate. Take away the bolts and the plate. If the automotive is a ’68 or early ’69, the pedal meeting nonetheless bolts to the firewall and connects to the cable on the prime, however its design is extra advanced. The pedal rod assist doesn’t disassemble because it does on late-69 and up C3s. Take away the 2 bolts from the pivot, and the pedal comes free.

From this level on, in case you are huge or tall, take away the driving force’s seat so you may lie on the ground along with your head underneath the IP. Our ’71 sizzling rod has racing seats bolted to the ground which can be simple to take away. Most folks may have inventory or different aftermarket seats, so the seat removing process could range. See the service handbook in your mannequin 12 months and seat sort or, when you’ve got aftermarket seats, the seat maker’s documentation.

In case you are huge or tall and your automotive lacks a tilt steering wheel, the job could also be simpler for those who take away the steering wheel. That requires a steering wheel puller, obtainable from auto components shops or on-line distributors. Pop off the horn button cap and take away the horn button components, and take away the steering wheel nut. Set up the puller, then flip the middle bolt to take away the wheel.

When you’re in place, you may be uncomfortable as a result of the footwell and ground underneath the seat are totally different heights.

You’ll be able to cut back that discomfort by rolling up a number of previous towels to make a pillow in your head and neck. Place them within the footwell forward of the place the ground curves as much as the seat mounting floor.
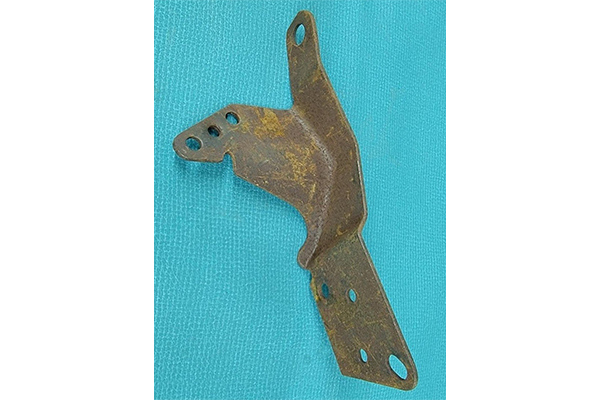
70-76 C3’s with automated transmissions, and all 77-82 C3’s, have a three-bolt bracket retaining the accelerator pedal. On 70-76 automatics, a three-hole extension from this bracket holds a throttle change for the THM400 automated. On some late C3s, this change additionally controls the chilly air hood solenoid. Disconnect the wires to the change. Not solely does this bracket retain the accelerator pedal rod, however the prime of it bolts excessive on the within of the firewall.

Arrange your work mild, get underneath the IP, then, utilizing the device mixture mentioned earlier, take away the bolt on the prime of the within of the firewall. On a 68-73 with a handbook transmission, that bolt retains the pedal finish of the accelerator cable. On a 70-73 automated automotive, that bolt retains each the pedal finish of the throttle cable and the highest of the accelerator assist bracket. On 74-82, that bolt retains the highest a part of the accelerator pedal rod bracket. That bracket should be eliminated earlier than the accelerator cable retainer may be unlocked and pushed via the firewall in direction of the engine.
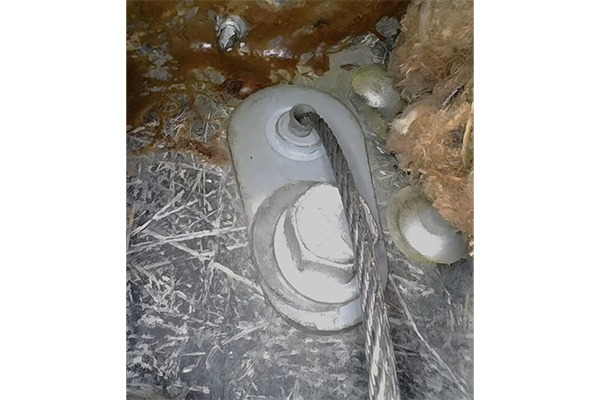
With 74-82, unlock the retainer by squeezing the tabs with slip joint pliers, such because the 8-inch, GearWrench “PitBull” Tongue and Groove pliers (PN 82169C) and pushing the retainer partway via the firewall. If the automotive is a 68-74, pop the top of the cable off the carburetor. Typically that may be performed with simply your fingers; nevertheless, it may be so tight, that you should pry it off with a flat-blade screwdriver.

On 68-73, take away the bolt holding the metallic finish of the cable housing to the bracket connected to the carburetor. If the automotive is a 74-81, take away the metallic accelerator cable finish retainer, then take away the cable finish from the carburetor’s throttle lever. If the automotive is an ’82, take away the cable finish retainer and cable finish from the throttle lever of the driving force’s aspect throttle physique. Lastly, take away the cable from the cable bracket on the carb or T.B.

On a 74-82, working underneath the IP whereas utilizing a piece mild to see, push the pedal arm ahead, then pull the cable finish out of the cable retainer on the pedal arm. Push the plastic cable retainer out of the arm. Line up the hole within the retainer with the cable, then slide the retainer off the cable.

On 68-73, push the cable from the engine in direction of and thru the firewall into the inside. On 74-82, take away the cable by pulling it via the opening within the firewall and out.

On 68-73, from underneath the IP, attain up and pull the accelerator pedal and cable down and out, being cautious to not snag any wiring. Set the components in your workbench.

Separate the previous 68-73 cable from the accelerator pedal by pulling the cable finish away from the opening on the prime of the pedal arm. Push the plastic retainer out of the pedal arm. Line up the hole within the retainer with the cable, then pull the retainer off the cable. Some retainers won’t be simple to get off the cable. If that’s the case along with your challenge, unfold the retainer barely with a small screwdriver.

On 68-73 push the pedal finish of a copy, 68-73 Corvette Accelerator Cable via the opening within the pedal, then push a brand new 68-82 Corvette Accelerator Cable Retainer over the cable, after which snap the retainer into the pedal arm.

We dabbed some RTV sealer on the aspect of the 68-73 cable’s mounting plate that faces the firewall, then, as soon as once more working underneath the IP with our GearWrench GWFL 85 lighting the best way, we fastidiously guided the engine finish of the cable up underneath the IP and thru the opening within the firewall.

On our ’71 challenge automotive, we alternatively pushed from beneath the IP and pulled on the engine finish of the cable till the mounting finish of the cable meeting mounting plate was flat towards the within of the firewall.

When you’ve got “pixie fingers,” you can begin the 68-73 cable’s retaining bolt into the bolt gap and get it finger-tight. Most will discover that unimaginable, so smear Vaseline on the bolt head to retain it within the ¼-drive, ⅜ swivel socket. Connect the lengthy extension and use that setup to insert the bolt. Use the swivel, the lengthy extension, and the 1/4-drive ratchet to screw the bolt via the 68-73 cable’s mounting plate and into the firewall. Quickly, go away the pedal meeting free.
On a 74-82, from the engine compartment, push the cable finish and cable retainer via the sq. gap within the firewall. Proceed to push the cable till the rear cable retainer snaps into place on the firewall

Verify it’s locked by utilizing your work mild to see the inside aspect of the firewall and confirm the retainer’s locking tabs have expanded over the perimeters of the opening within the firewall. Join the cable to the pedal arm by pushing a brand new 68-82 Corvette Accelerator Cable Retainer onto the cable, then snap the retainer into the highest of the pedal arm.

For late-69-82, clear the accelerator pivot and lubricate it. Put the pivot in place on the firewall, and push the accelerator pedal meeting into the pivot.

On 68-early 69 (not proven), reinstall the pedal meeting by bolting the pivot to the firewall. On late 69-73 handbook trans vehicles, reinstall the quilt plate and the 2 bolts.
On 70-74 automatics and all 75-82’s (not proven), reinstall the 3-bolt bracket. With that, fortunately, you might be performed working underneath the instrument panel.

On 68-74, push the top of the cable onto the ball stud on the carburetor’s throttle lever.

If the automotive is a 68-73, set up Zip’s new 68-73 Corvette Accelerator Cable Clamp on the carburetor’s accelerator cable mount. On 74-82, push the cable’s ahead retainer via the slot on the cable retainer bracket on the carburetor or throttle physique.

With 75-82, the stud within the throttle arm of the carburetor or major throttle physique must be lubricated. Then, push the top of the cable over the stud and change the throttle cable retainer.
Visually examine the cable operation. On 68-81, make certain the choke will not be enabled, then with all C3s confirm the throttle lever is at curb idle. Some engines have “anti-dieseling solenoids,” and, in that case geared up, that solenoid should not be enabled for this step. The throttle lever wants to the touch the idle screw. Subsequent, pull the cable all the best way into the housing and confirm the carburetor or throttle physique is at large open throttle.

Our challenge automotive’s 850 Holley is on an Edelbrock Performer RPM manifold, so the cable housing mounting location in area was totally different than inventory. Our examine of curb idle was okay, however once we pulled the cable all the best way again, the 850’s secondaries weren’t large open.
To repair that downside, we moved the cable housing’s metallic finish within the cable bracket to a degree the place, at one finish of the journey, the 850 was at curb idle, and on the different finish, the secondaries had been large open. We marked the place of the cable within the clamp. We additionally determined to interchange the bolt that got here with the clamp with our totally different bolt that had an integral lock washer.
To complete off this challenge, we reinstalled the driving force’s seat and put the steering wheel again in place. Then went out for a highway take a look at!
Source link